
At Cloudflare, we produce all types of video content, ranging from recordings of our Weekly All-Hands to product demos. Being able to stream video on demand has two major advantages when compared to live video:
- It encourages asynchronous communication within the organization
- It extends the life time value of the shared knowledge
Historically, we haven’t had a central, secure repository of all video content that could be easily accessed from the browser. Various teams choose their own platform to share the content. If I wanted to find a recording of a product demo, for example, I’d need to search Google Drive, Gmail and Google Chat with creative keywords. Very often, I would need to reach out to individual teams to finally locate the content.
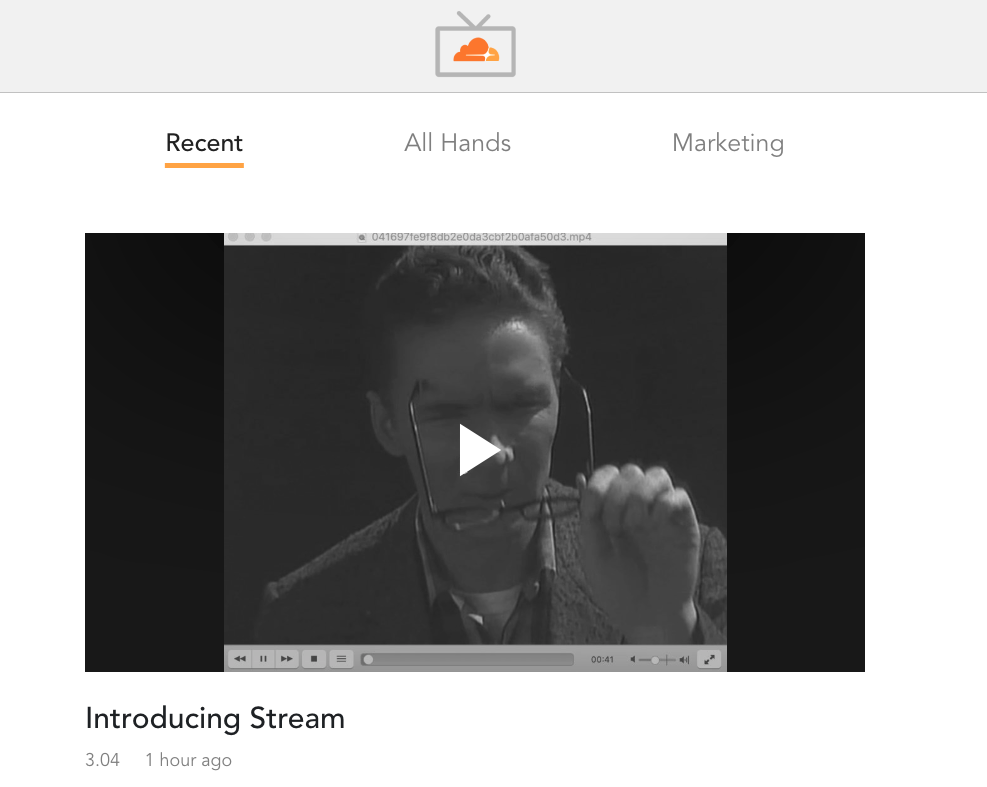
So we decided we wanted to build CloudflareTV, an internal Netflix-like application that can only be accessed by Cloudflare employees and has all of our videos neatly organized and immediately watchable from the browser.
We wanted to achieve the following when building CloudflareTV:
- Security: make sure the videos are access controlled and not publicly accessible
- Authentication: ensure the application can only be accessed by Cloudflare employees
- Tagging: allow the videos to be categorized so they can be found easily
- Originless: build the entire backend using Workers and Stream so we don’t need separate infrastructure for encoding, storage and delivery
Securing the videos using signed URLs
Every video uploaded to Cloudflare Stream can be locked down by requiring signed URLs. A Stream video can be marked as requiring signed URLs using the UI or by making an API call:
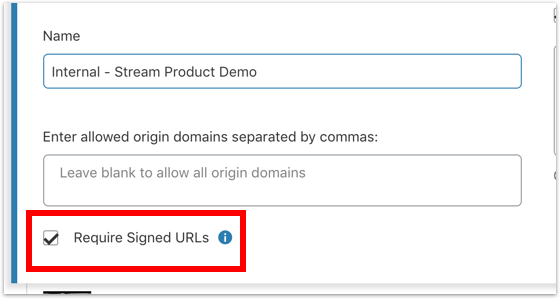
Once locked down in this way videos can’t be accessed directly. Instead, they can only be accessed using a temporary token.
In order to create signed tokens, we must first make an API call to create a key:
curl -X POST -H "X-Auth-Email: {$EMAIL}" -H "X-Auth-Key: {$AUTH_KEY}" "https://api.cloudflare.com/client/v4/accounts/{$ACCOUNT_ID}/media/keys"The API call will return a JSON object similar to this:
{
  "result": {
    "id": "...",
    "pem": "...",
    "jwk": "...",
    "created": "2020-03-10T18:17:00.075188052Z"
  },
  "success": true,
  "errors": [],
  "messages": []
}
We can use the id and pem values in a Workers script that takes a video ID and returns a signed token that expires after 1 hour:
async function generateToken(video_id) {
var exp_time = Math.round((new Date()).getTime() / 1000)+3600;

    const key_data = {
        'id': '{$KEY_ID}',
        'pem': '{$PEM}',
        'exp': exp_time
    }

    let response = await fetch('https://util.cloudflarestream.com/sign/'+video_id, {
        method: 'POST',
        body: JSON.stringify(key_data)
    });
    let token_value = await response.text();
    return token_value;
}
The returned signed token should look something like this:
eyJhbGciOiJSUzI1NiIsImtpZCI6IjExZDM5ZjEwY2M0NGY1NGE4ZDJlMjM5OGY3YWVlOGYzIn0.eyJzdWIiOiJiODdjOWYzOTkwYjE4ODI0ZTYzMTZlMThkOWYwY2I1ZiIsImtpZCI6IjExZDM5ZjEwY2M0NGY1NGE4ZDJlMjM5OGY3YWVlOGYzIiwiZXhwIjoiMTUzNzQ2MDM2NSIsIm5iZiI6IjE1Mzc0NTMxNjUifQ.C1BEveKi4XVeZk781K8eCGsMJrhbvj4RUB-FjybSm2xiQntFi7AqJHmj_ws591JguzOqM1q-Bz5e2dIEpllFf6JKK4DMK8S8B11Vf-bRmaIqXQ-QcpizJfewNxaBx9JdWRt8bR00DG_AaYPrMPWi9eH3w8Oim6AhfBiIAudU6qeyUXRKiolyXDle0jaP9bjsKQpqJ10K5oPWbCJ4Nf2QHBzl7Aasu6GK72hBsvPjdwTxdD5neazdxViMwqGKw6M8x_L2j2bj93X0xjiFTyHeVwyTJyj6jyPwdcOT5Bpuj6raS5Zq35qgvffXWAy_bfrWqXNHiQdSMOCNa8MsV8hljQshStream provides an embed code for each video. The “src” attribute of the embed code typically contains the video ID. But if the video is private, instead of setting the “src” attribute to the video ID, you set it to the signed token value:
<stream src="eyJhbGciOiJSUzI1NiIsImtpZCI6IjExZDM5ZjEwY2M0NGY1NGE4ZDJlMjM5OGY3YWVlOGYzIn0.eyJzdWIiOiJiODdjOWYzOTkwYjE4ODI0ZTYzMTZlMThkOWYwY2I1ZiIsImtpZCI6IjExZDM5ZjEwY2M0NGY1NGE4ZDJlMjM5OGY3YWVlOGYzIiwiZXhwIjoiMTUzNzQ2MDM2NSIsIm5iZiI6IjE1Mzc0NTMxNjUifQ.C1BEveKi4XVeZk781K8eCGsMJrhbvj4RUB-FjybSm2xiQntFi7AqJHmj_ws591JguzOqM1q-Bz5e2dIEpllFf6JKK4DMK8S8B11Vf-bRmaIqXQ-QcpizJfewNxaBx9JdWRt8bR00DG_AaYPrMPWi9eH3w8Oim6AhfBiIAudU6qeyUXRKiolyXDle0jaP9bjsKQpqJ10K5oPWbCJ4Nf2QHBzl7Aasu6GK72hBsvPjdwTxdD5neazdxViMwqGKw6M8x_L2j2bj93X0xjiFTyHeVwyTJyj6jyPwdcOT5Bpuj6raS5Zq35qgvffXWAy_bfrWqXNHiQdSMOCNa8MsV8hljQsh" controls></stream>
<script data-cfasync="false" defer type="text/javascript" src="https://embed.videodelivery.net/embed/r4xu.fla9.latest.js"></script>
Tagging videos
We would like to categorize videos uploaded to Stream by tagging them. This can be done by updating the video object’s meta field and passing it arbitrary JSON data. To categorize a video, we simply update the meta field with a comma-delimited list of tags:
curl -X POST -d '{"uid": "VIDEO_ID", "meta": {"tags": "All Hands,Stream"}}' "https://api.cloudflare.com/client/v4/accounts/{$ACCOUNT_ID}/stream/{$VIDEO_ID}" -H "X-Auth-Email: {$EMAIL}" -H "X-Auth-Key: {$ACCOUNT_KEY}" -H "Content-Type: application/json"Later, we will create a getVideos Worker function to fetch a list of videos and all associated data so we can render the UI. The tagging data we just set for this video will be included in the video data returned by the Worker.
Fetching Video Data using Workers
The heart of the UI is a list of videos. How do we get this list of videos programmatically? Stream provides an endpoint that returns all the videos and any metadata associated with them.
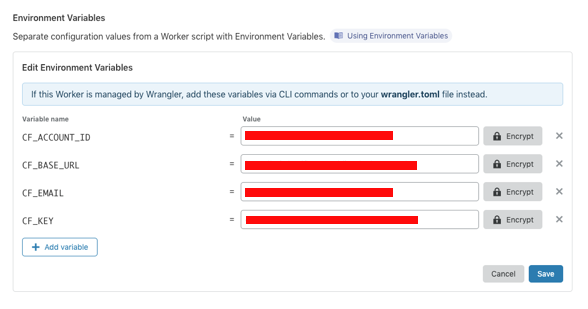
First, we set up environment variables for our Worker:
Next, we wrote a simple Workers function to call the Stream API and return a list of videos, eliminating the need for an origin:
async function getVideos() {
const headers = {
'X-Auth-Key': CF_KEY,
'X-Auth-Email': CF_EMAIL
}
let response = await fetch(“https://api.cloudflare.com/client/v4/accounts/” + CF_ACCOUNT_ID + '/stream', {
headers: headers
});
let video_list = await response.text();
return video_list;
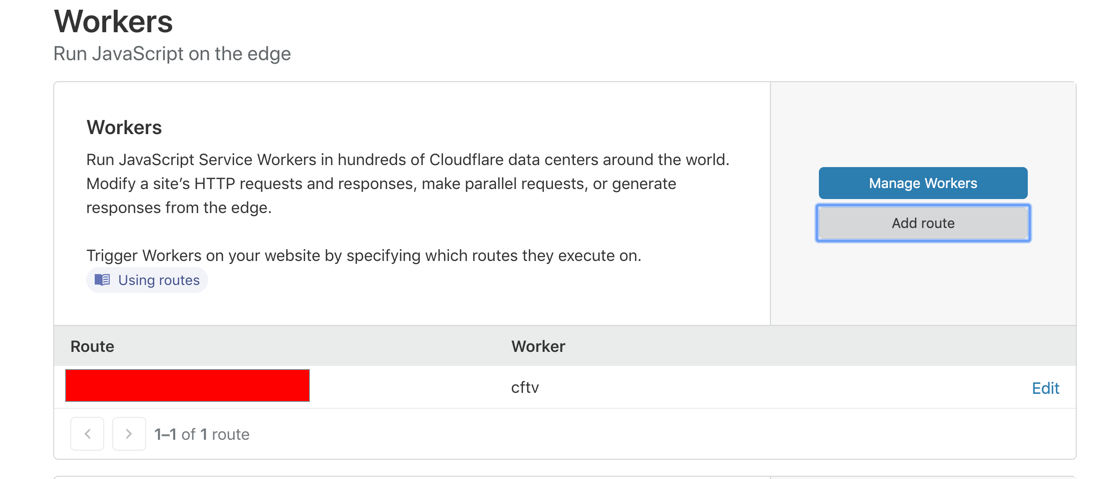
}Lastly, we set up a zone and within the zone, we set up a Worker routes pointing to our Workers script. This can be done from the Workers tab:
Authenticating using Cloudflare Access
Finally, we want to restrict access to CloudflareTV to people within the organization. We can do this using Cloudflare Access, available under the Access tab.
To restrict access to CloudflareTV, we must do two things:
- Add a new login method
- Add an access policy
To add a new login method, click the “+” icon and choose your identity provider. In our case, we chose Google:
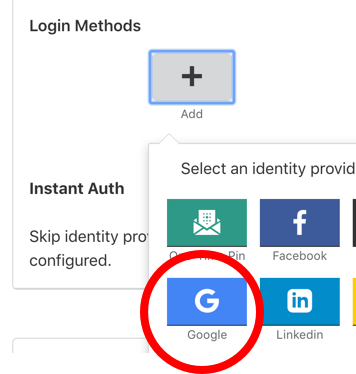
You will see a pop up asking for information including Client ID and Client Secret, both key pieces of information required to set up Google as the identity provider.
Once we add an identity provider, we want to tell Access “who specifically should be allowed to access our application?” This is done by creating an Access Policy.
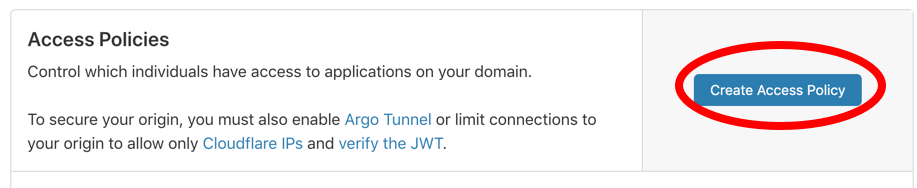
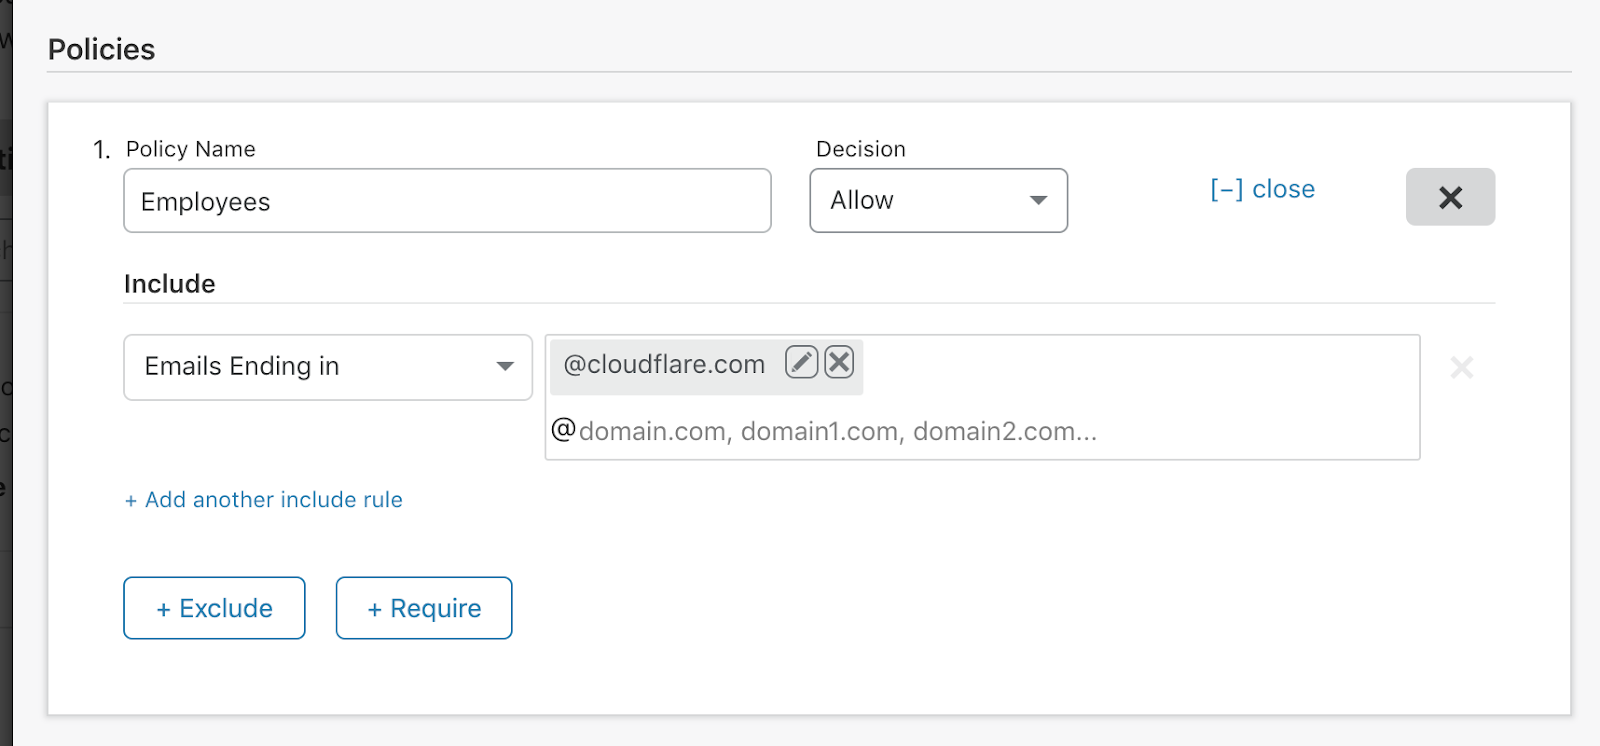
We set up an Access Policy to only allow emails ending in our domain name. This effectively makes CloudflareTV only accessible by our team!
What’s next?
If you have interesting ideas around video, Cloudflare Stream lets you focus on your idea while it handles storage, encoding and the viewing experience for your users. Coupled that with Access and Workers, you can build powerful applications. Here are the docs to help you get started: